Article: Build Your Entity Profile Page content
Schools and clinical sites can create and customize their organization's Entity Profile in ACEMAPP. Your entity profile can include organizational information, parking instructions, security policies, and more.
- For schools, this profile is visible to members (e.g., students, faculty) directly affiliated with your organization.
- For clinical sites, it's visible to members through a rotation assignment (most common) or direct affiliation (less common).
Use the Entity Profile tools to:
-
Organize important information for members
-
Create pages grouped by topic or audience
-
Display instructions, documents, and media
-
Preview content before publishing
-
Share your profile through announcements
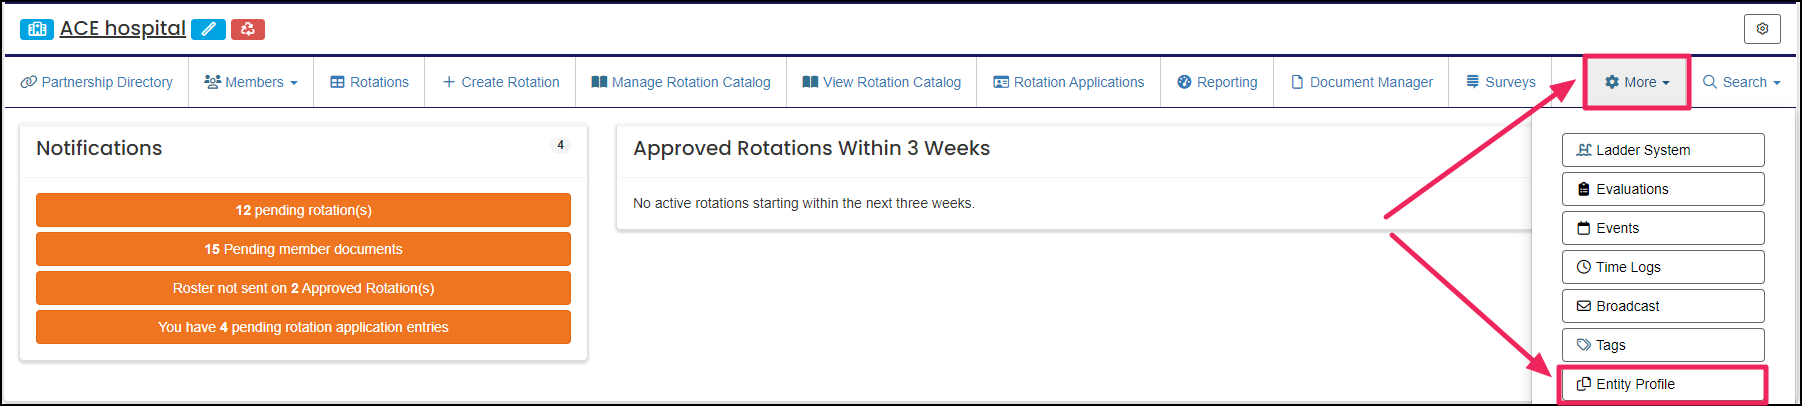
Step 1: Navigate to the Entity Profile
To locate your Entity Profile:
-
Click the "More" tab in the top menu.
-
Select "Entity Profile" from the dropdown.
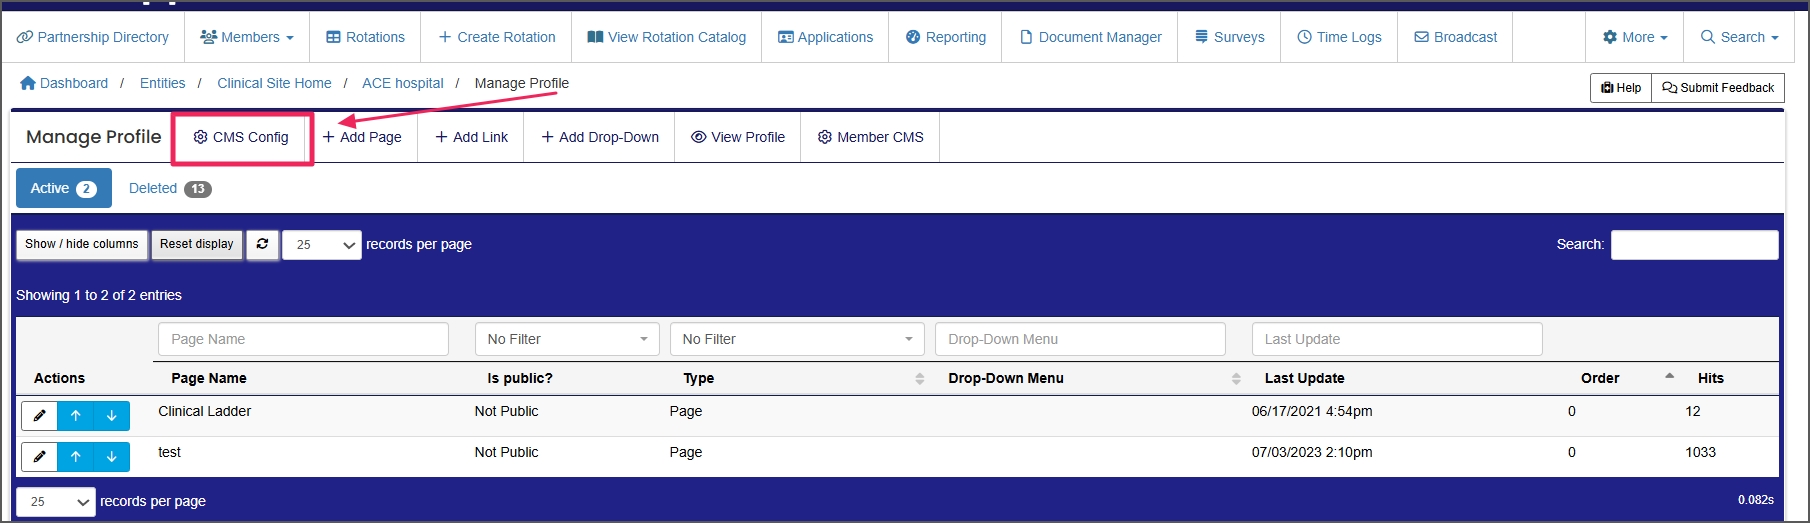
Step 2: Open CMS Configuration
Click "CMS Config" to begin editing your profile. This tool allows you to:
-
Organize content into tabs by user type, program, or category.
-
Customize the visibility and structure of your profile content.
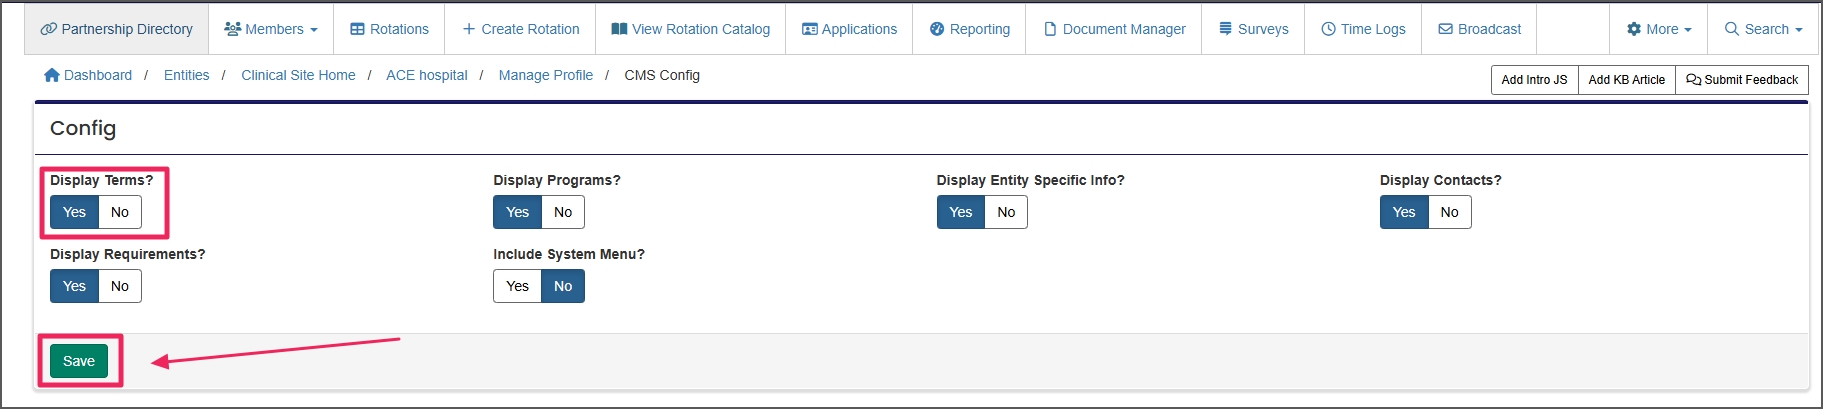
Step 3: Configure Display Options
For each display option, select "Yes" or "No". Then, click"Save" to apply your selections.
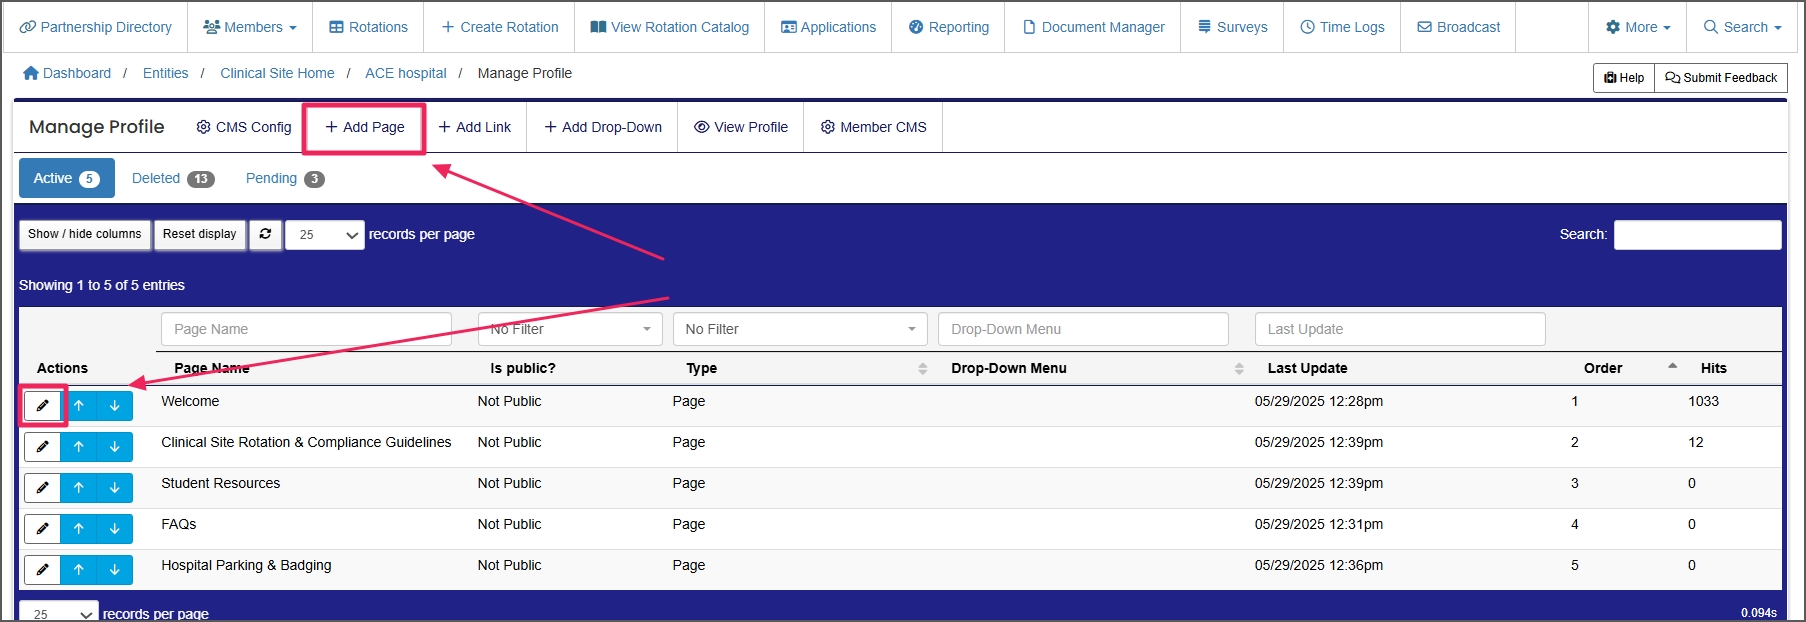
Step 4: Add or Edit a Page
You can now begin adding content to your profile:
-
Click "Add Page" to create a new section.
-
Or click "Edit" to modify an existing page.
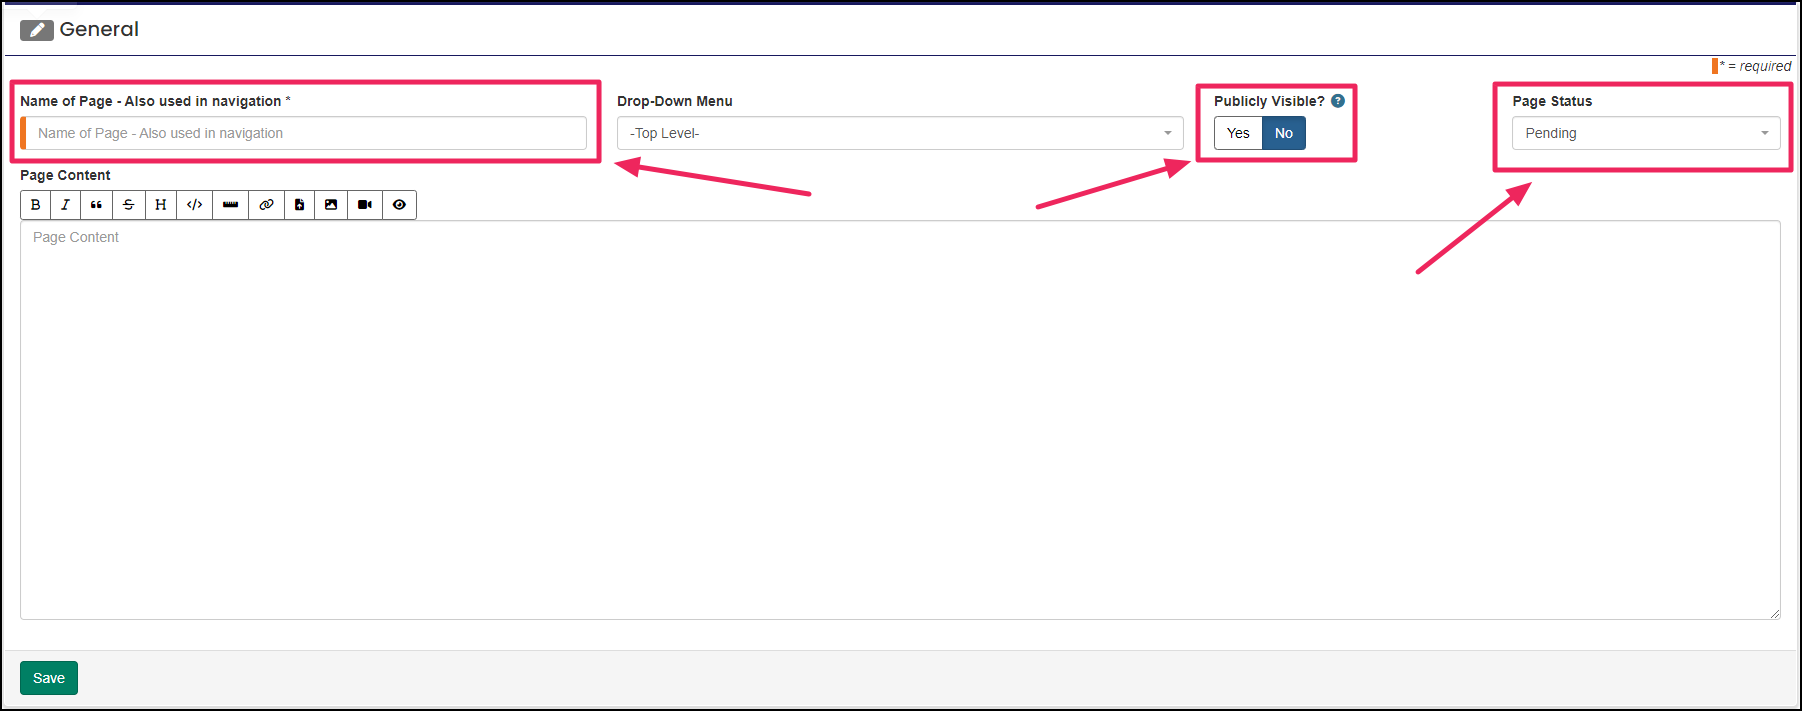
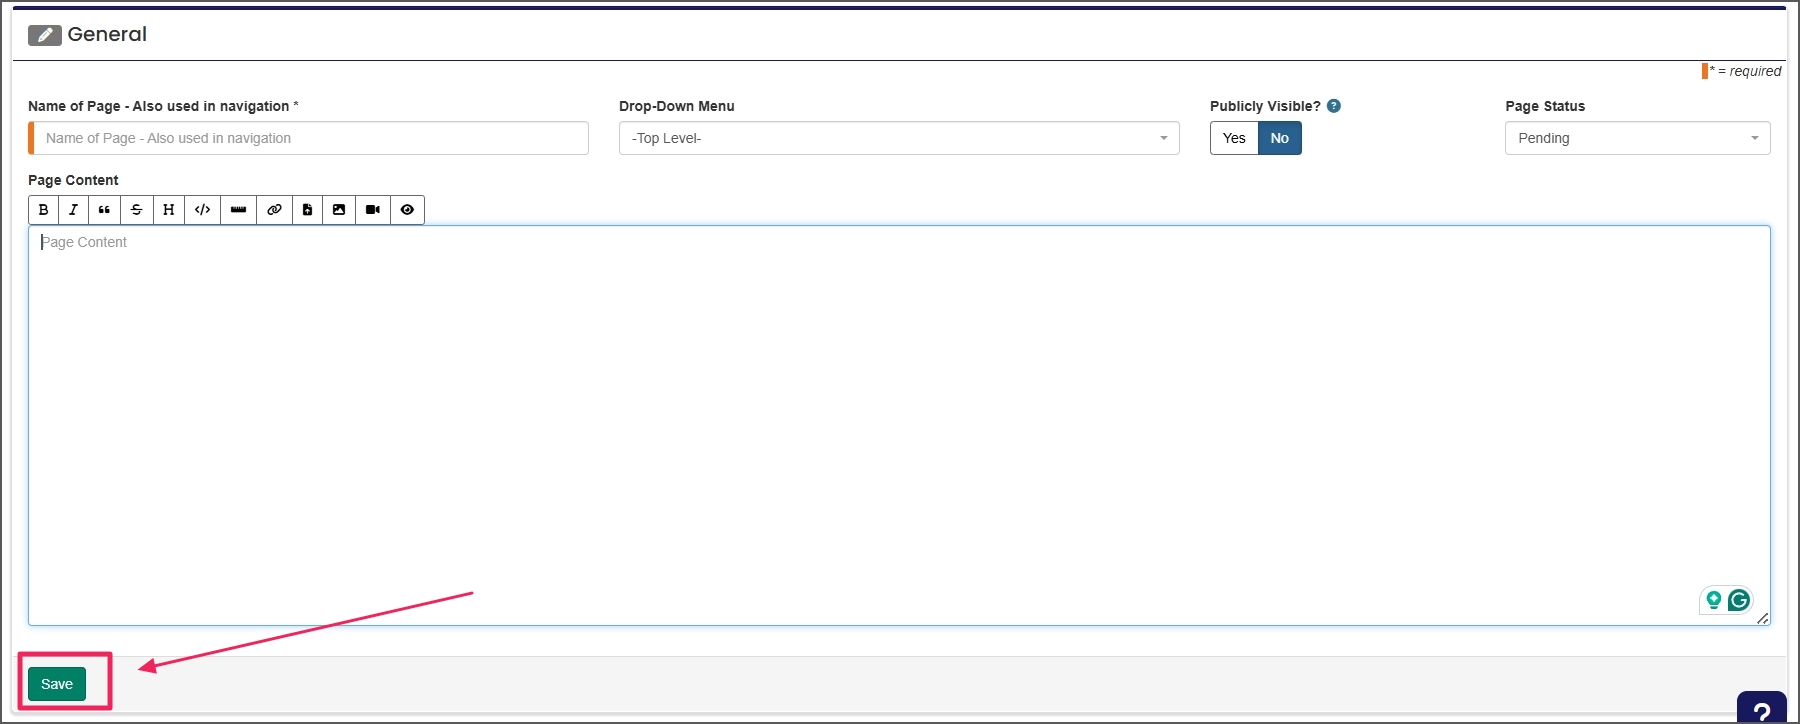
Step 5: Configure Page Details
For each page, provide the following:
-
Name: Title of the page.
-
Content: Body text or resources.
-
Publicly Visible: Enable or restrict public access.
-
Status: Set the page as active or inactive.
Note: If Publicly Visible is disabled, only logged-in users can access the page.
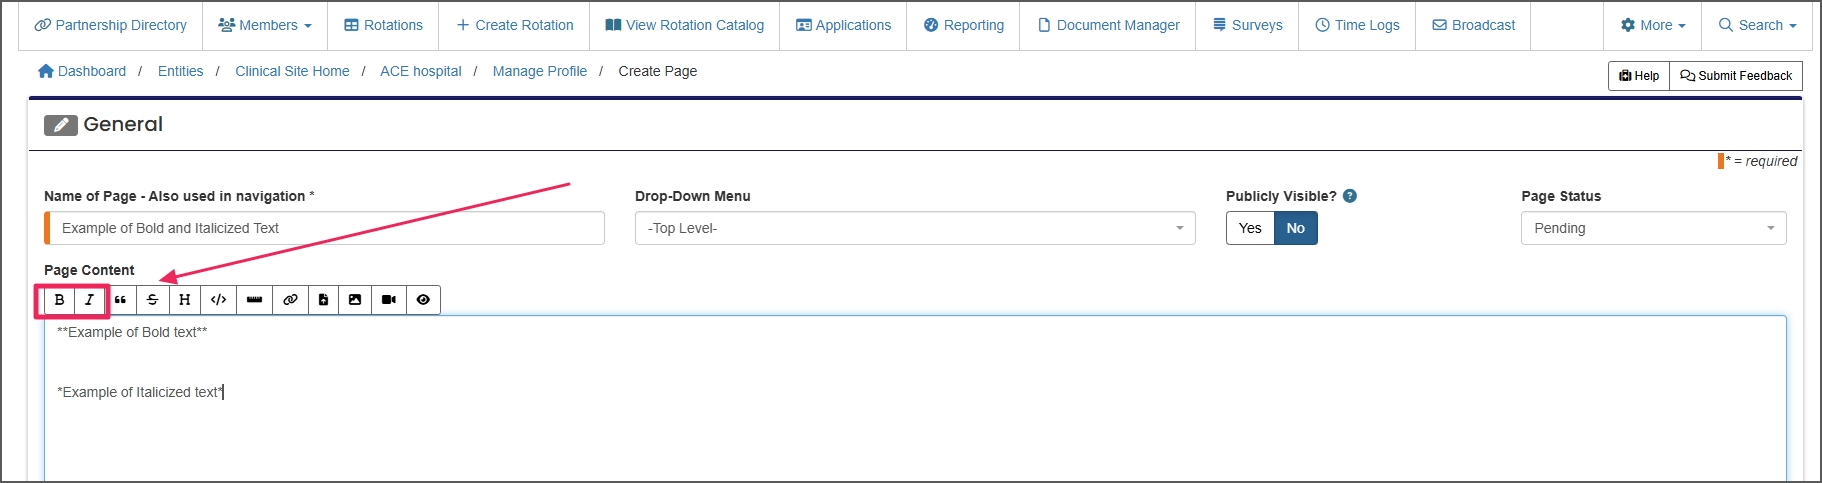
Step 6: Format Text with Toolbar
Use the toolbar to apply formatting:
-
Bold: Click the B icon to make text bold.
-
Italic: Click the I icon to italicize text.
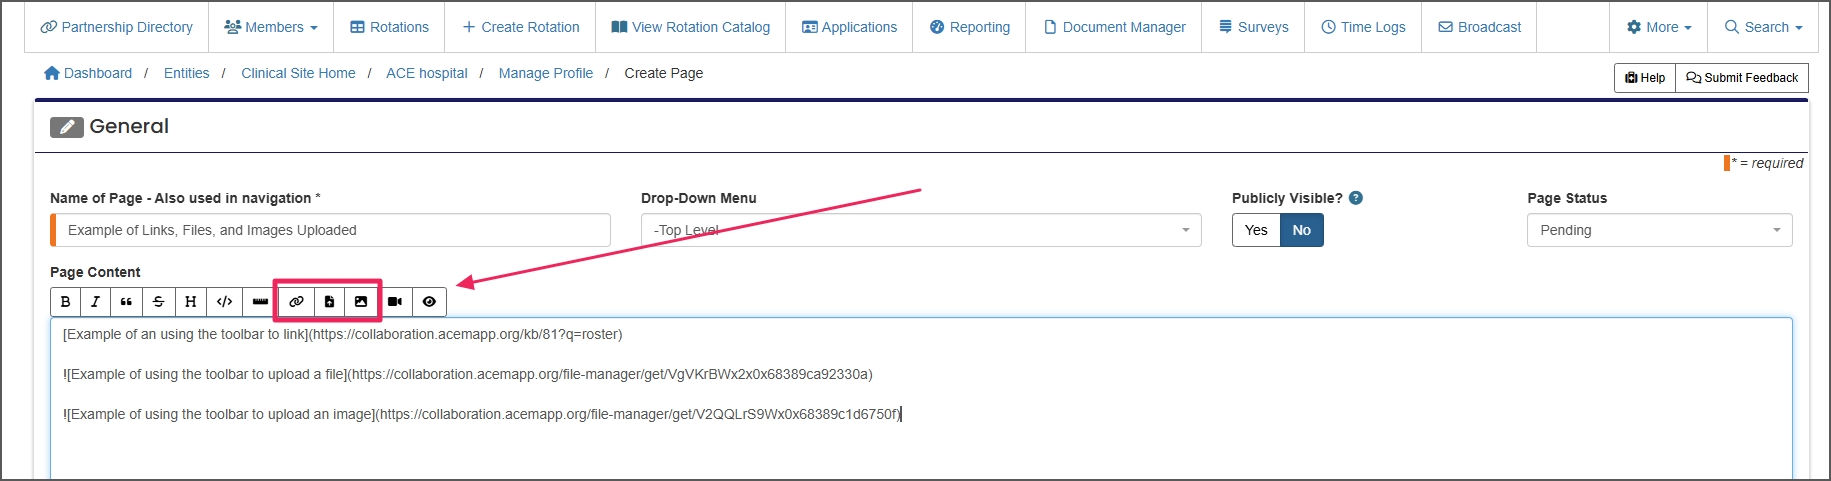
Step 7: Add Links, Files, or Images
Enhance your profile content by incorporating links, documents, and images.
Add Links, Files, or Images
Add Links:
-
Highlight the text you want to turn into a link.
-
Click the "Link" icon.
-
In the first box, type the display text.
-
In the second box, paste the URL.
-
Click "Submit."
Upload Document:
-
Place your cursor where you want the link to the document.
-
Click the "File" (paper) icon.
-
Type the link text users will click.
-
Click "Choose File" and upload from your computer.
-
Click "Submit."
Insert an Image:
-
Click the "Image" icon.
-
Choose an image (JPEG, PNG, or PDF) under 20 MB.
- Note: Videos must be in MP4 format, 360–1080p.
-
Resize your image before uploading.
-
Add alt-text — a brief description of the image (e.g., "Hospital logo", "Man holding glass").
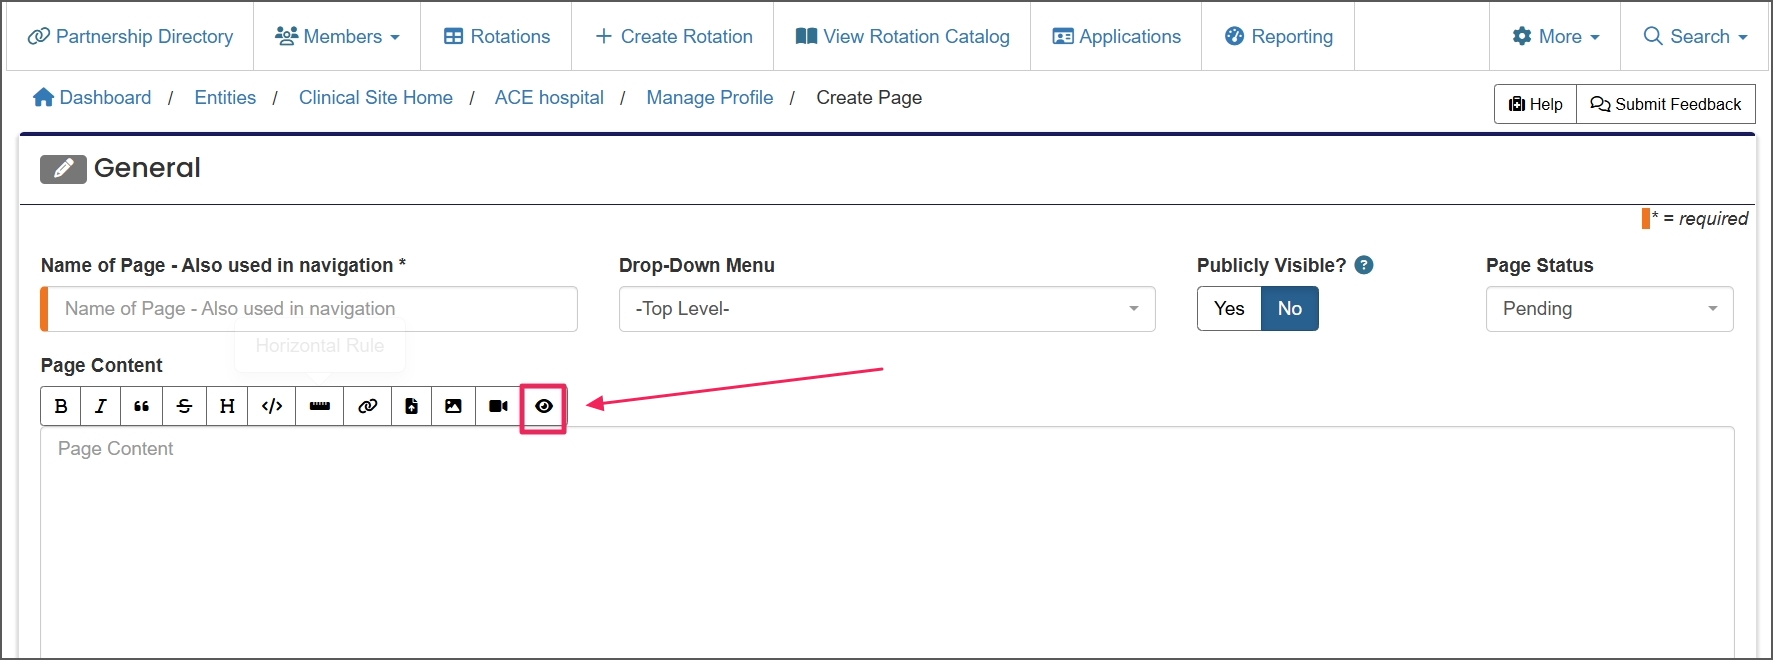
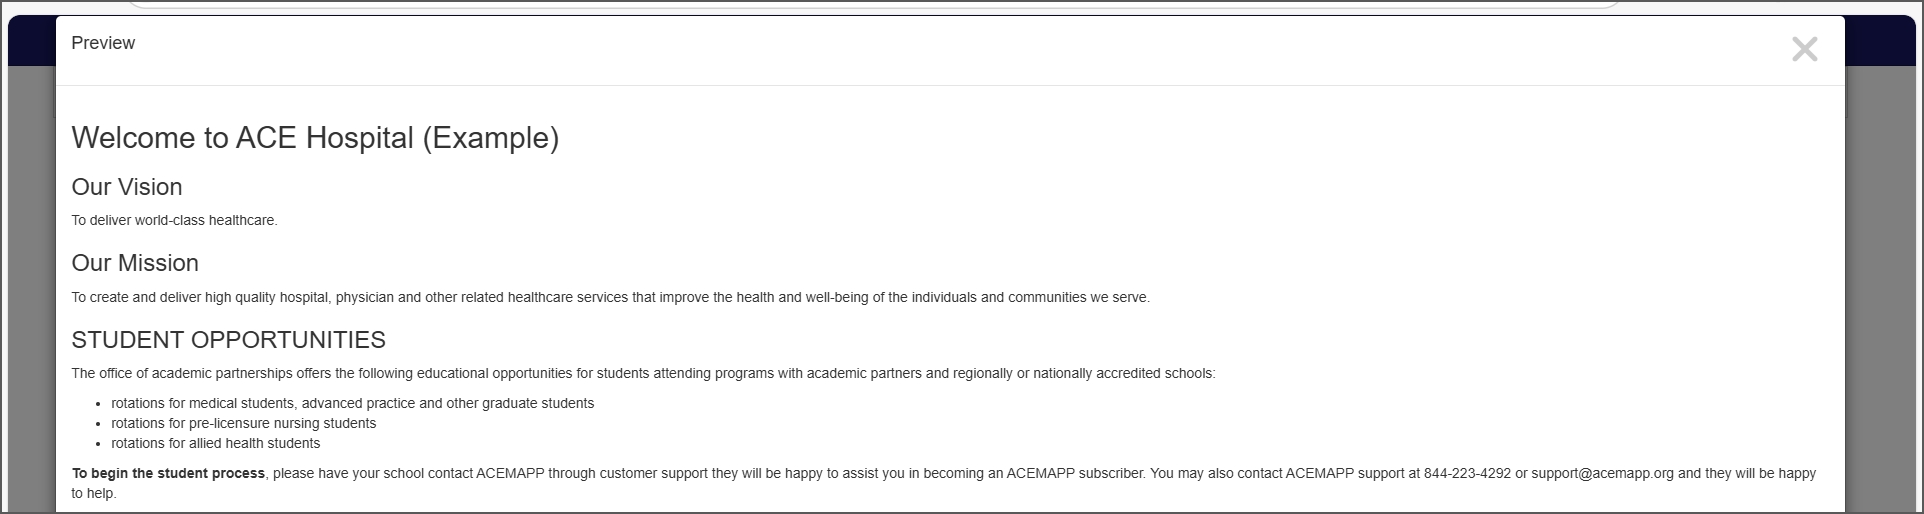
Step 8: Preview Your Page
Click the "Preview" button on the toolbar to see how your page will appear to viewers.
Step 9: Save Your Page
Once you’re satisfied with the content, click "Save."
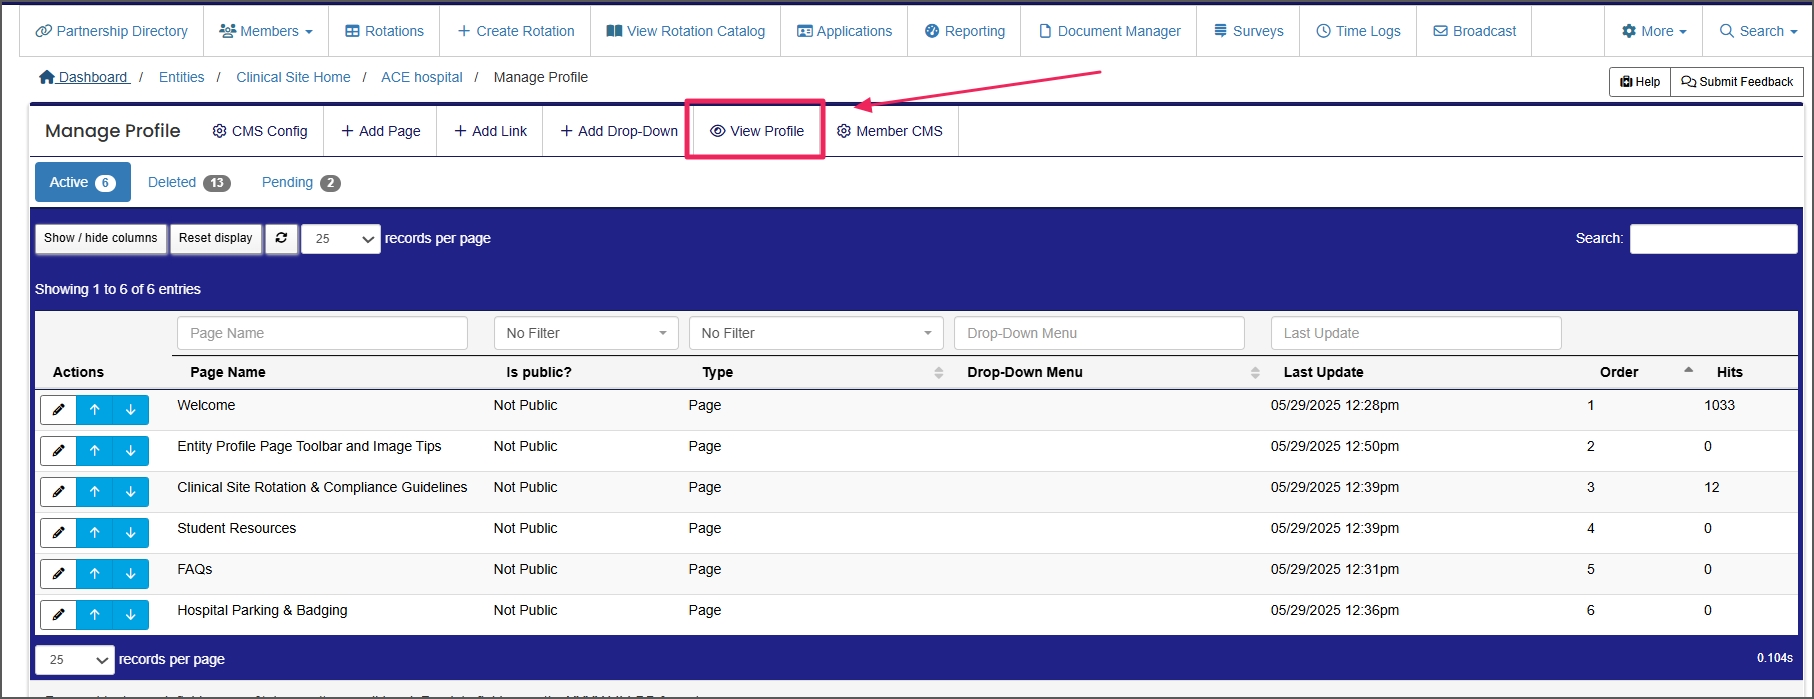
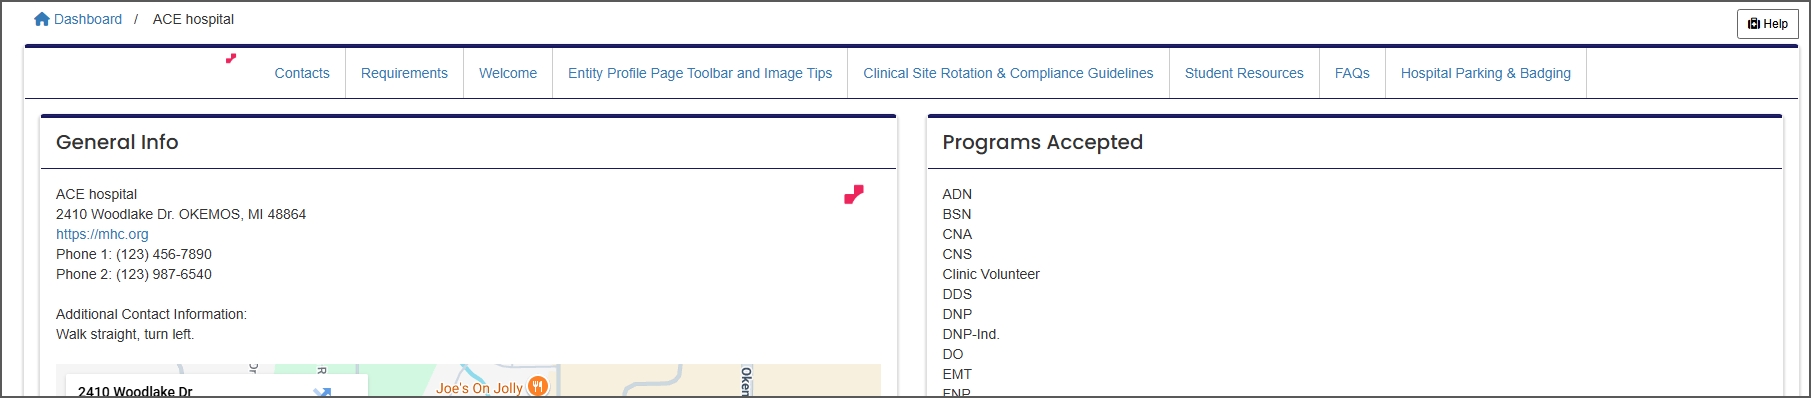
Step 10: View Your Updated Profile
To view your live profile:
-
Click "Manage Profile" in the breadcrumb navigation.
-
Then click "View Profile."
Your added or updated pages will now be visible.

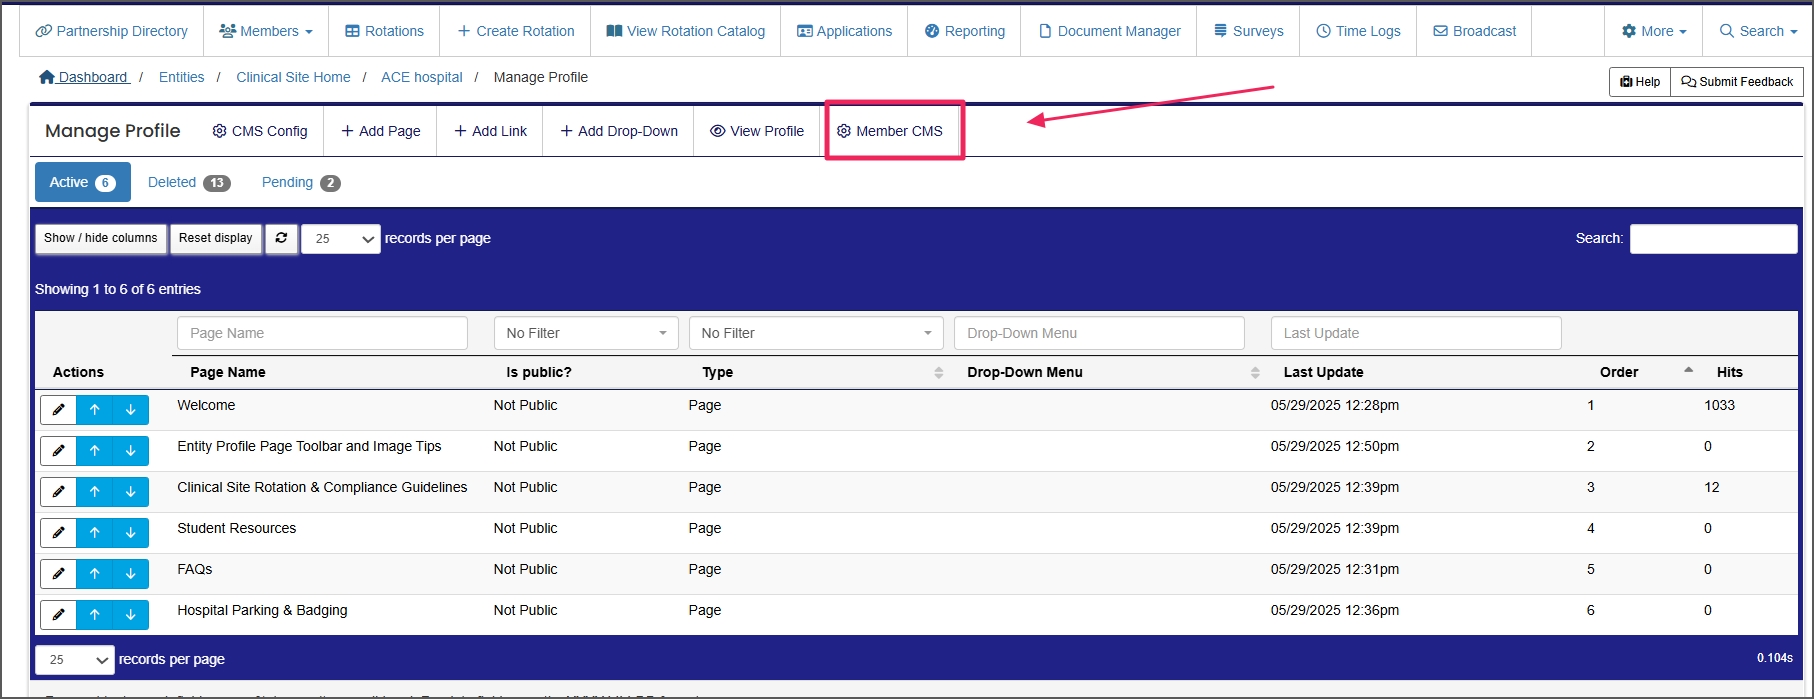
Step 11: Share Your Profile with Members via Member CMS
Use the "Member CMS" tab to broadcast your Entity Profile link to members. This feature allows you to:
-
Add new messages
-
Edit or update announcements
We recommend creating an announcement and sharing the link to your profile on students' and faculty members’ dashboards.
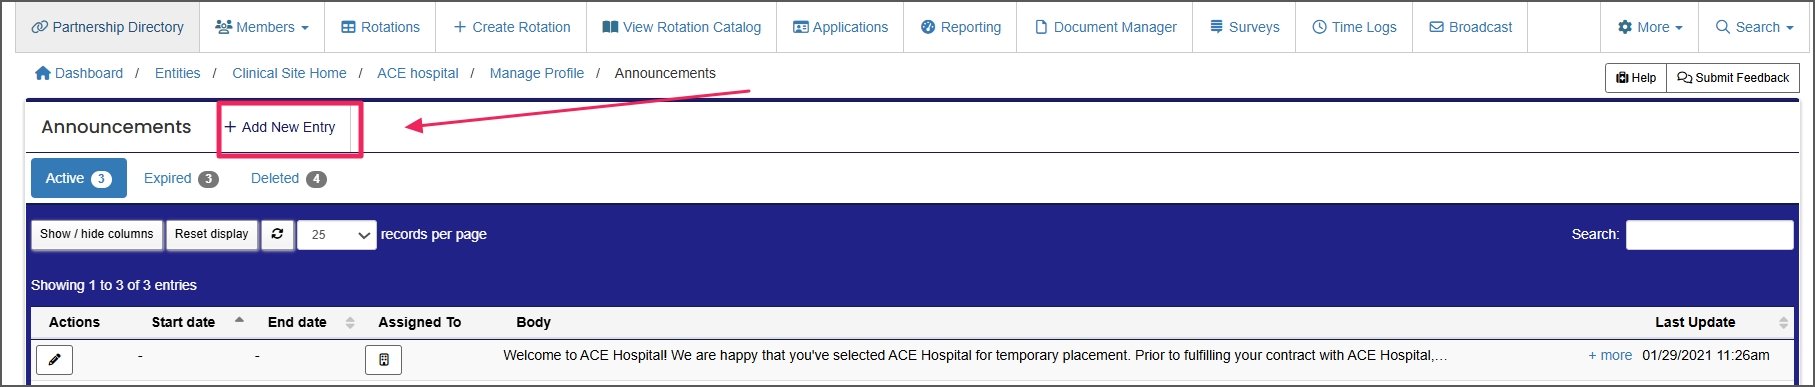
Step 12: Create an Announcement
Use this page to add a new announcement with the link to your Entity Profile. This ensures members can easily access the resources they need.
An Entity is a School, Clinical Site, High School, Company, etc.
The Profile allows you to enter and edit personal information in ACEMAPP.
The Profile allows you to enter and edit personal information in ACEMAPP.
An Affiliation is a connection between a Member and an Entity.
Affiliations define Member Types and often include Graduation or End Dates.
A rotation is a scheduled clinical experience.
An Entity is a School, Clinical Site, High School, Company, etc.
The Profile allows you to enter and edit personal information in ACEMAPP.
The Profile allows you to enter and edit personal information in ACEMAPP.
An Entity is a School, Clinical Site, High School, Company, etc.
The Profile allows you to enter and edit personal information in ACEMAPP.
An Entity is a School, Clinical Site, High School, Company, etc.
The Profile allows you to enter and edit personal information in ACEMAPP.
An Entity is a School, Clinical Site, High School, Company, etc.
The Profile allows you to enter and edit personal information in ACEMAPP.
The Profile allows you to enter and edit personal information in ACEMAPP.
The Profile allows you to enter and edit personal information in ACEMAPP.
The Profile allows you to enter and edit personal information in ACEMAPP.
The Profile allows you to enter and edit personal information in ACEMAPP.
The Profile allows you to enter and edit personal information in ACEMAPP.
The Profile allows you to enter and edit personal information in ACEMAPP.
The Profile allows you to enter and edit personal information in ACEMAPP.
The Profile allows you to enter and edit personal information in ACEMAPP.
The Profile allows you to enter and edit personal information in ACEMAPP.
An Entity is a School, Clinical Site, High School, Company, etc.
The Profile allows you to enter and edit personal information in ACEMAPP.
