Article: Overview of Case Log Table content
The overview of your Case Logs Table is meant to help you get familiar with the layout and show you what you can do from the case log table. Please see the related Help Desk guides at the bottom for more details on various functions.
Navigate to Case Logs
Click the "Case Logs" tab in your navigation bar.
Note: Depending on your screen size, you may need to click "More" dropdown from your navigation bar to select "Case Logs".
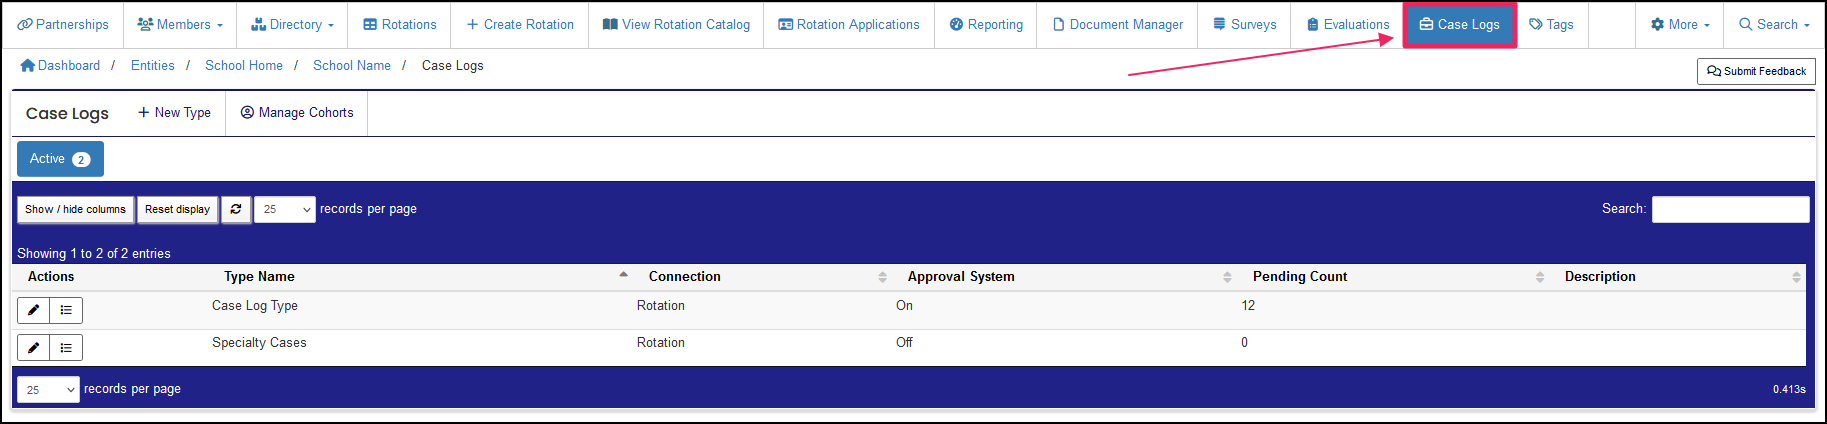
Case Logs Table
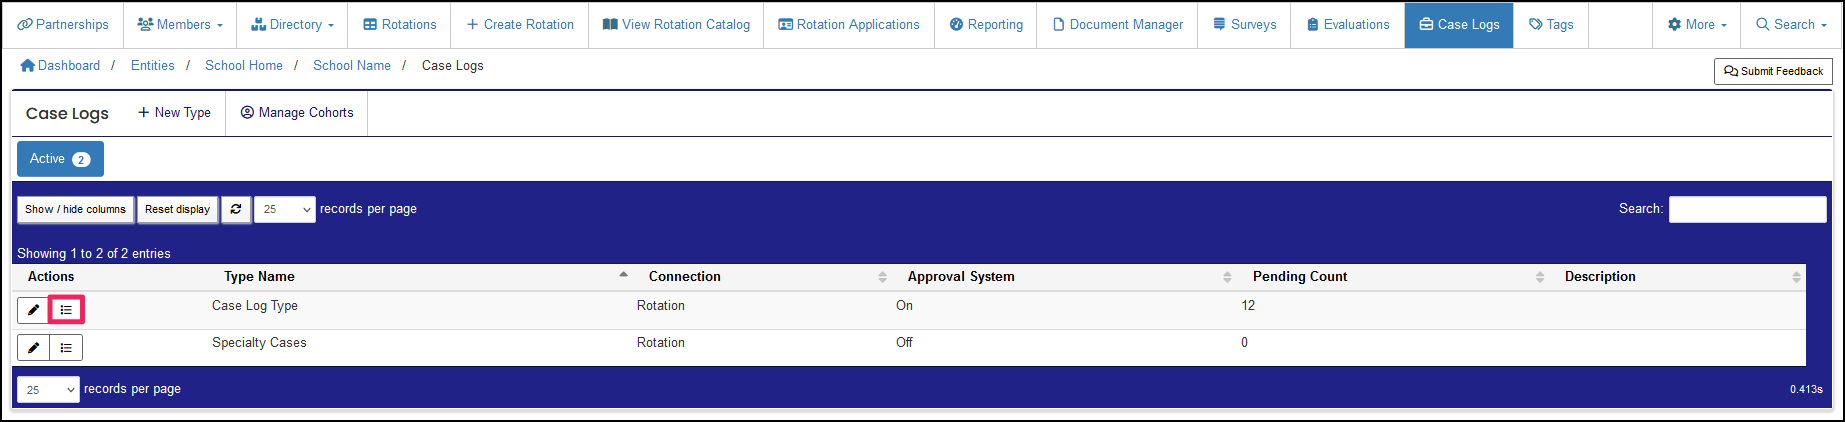
Actions
List: (Bulleted List Icon) Take you to the specific case log type to view entries, export, and run reports.
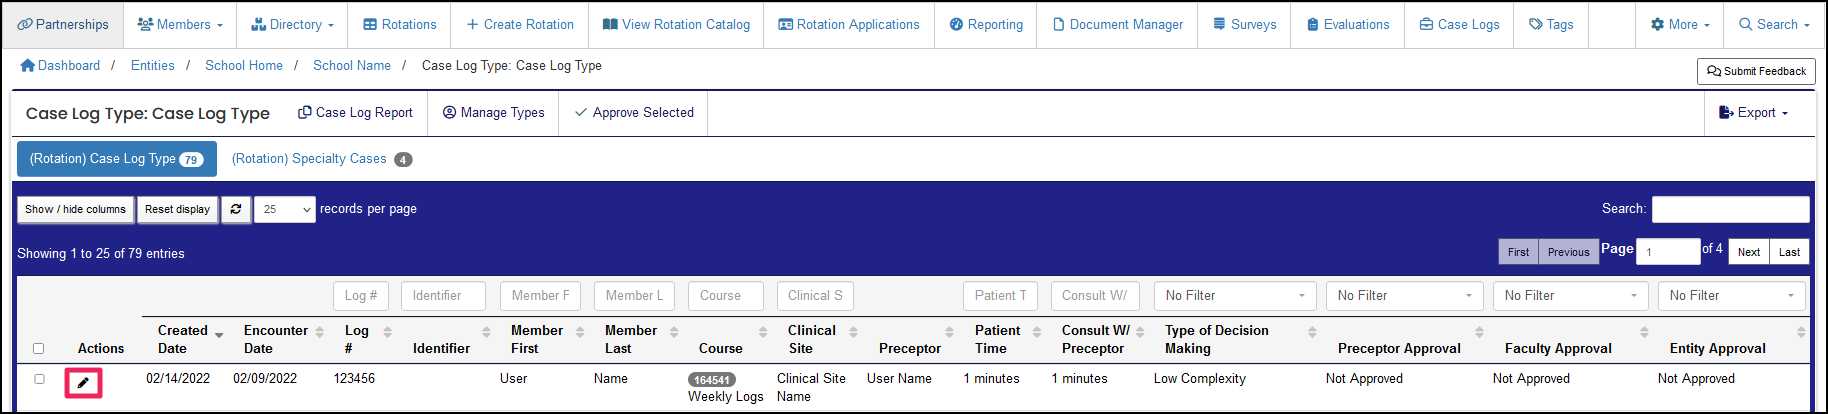
Case Logs Table Features
Once in the "List" view of the case log you'd like to manage, you can utilize the following features.
Expand the records per page
Adjust the records per page to show more results on one page of the table.
Search
Search by name, log #, course number/name, clinical site, and preceptor.
Sort Columns
This feature allows you to sort by each column.
Select
Allows you to select all case logs you would like to manage.
Note: You can select the box at the top of the column to quickly select all records displayed on the table.
Approve Selected
Allows you to quickly approve the selected case logs.
Note: The approved selected option will only appear if you have approval rights. Not everyone can approve case logs.
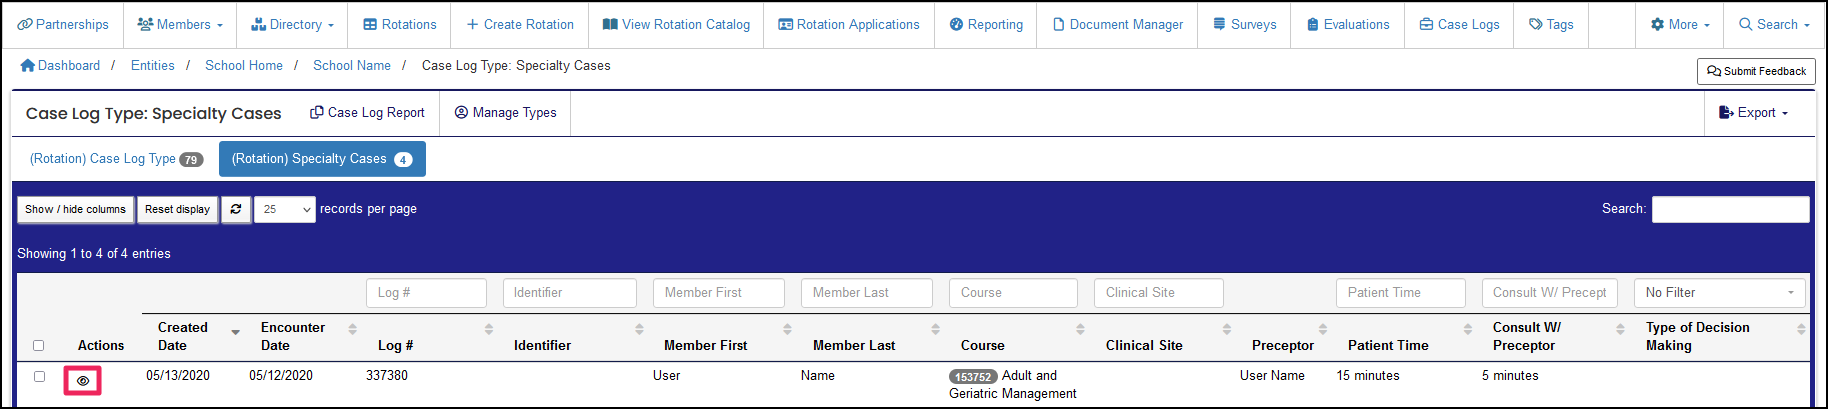
Action Icons
- Edit: (Pencil Icon) Review a member's case log entry and manage.
- View: (Eye Icon) View a member's case log entry and ability to print.
Export
- Export All: Export all case logs.
- Export Selected: Export only those you choose.
Case Log Report
Gather and analyze clinical encounter information and aggregate the data to allow you to see the types of patients students are seeing.
- Please see our Related Help Desk guide for further guidance at the bottom of this article.
